
If you thought wedge stamping is a personalization luxury reserved for tour professionals, you’d be mistaken. Today, golfers of any ability are embracing the trend of adding a custom touch to their wedges.
Here are 5 creative wedge stamping ideas to help you personalize your golf clubs.
Stick around until the end of the article to learn how to stamp your wedges at home, so you can spruce up your clubs without spending a fortune.
Wedge Stamping Ideas
Our favorite wedge stamping ideas draw from personal hobbies and connections. For example, stamp your name, favorite quote, or sports team. Alternatively, you can stamp your wedges with a unique pattern design, or simply with the name of the club itself to make it easier to grab at a glance.
The following wedge stamping ideas range from subtle to extravagant, providing you with inspiration to customize your own set of wedges.
1. Stamp a Unique Pattern
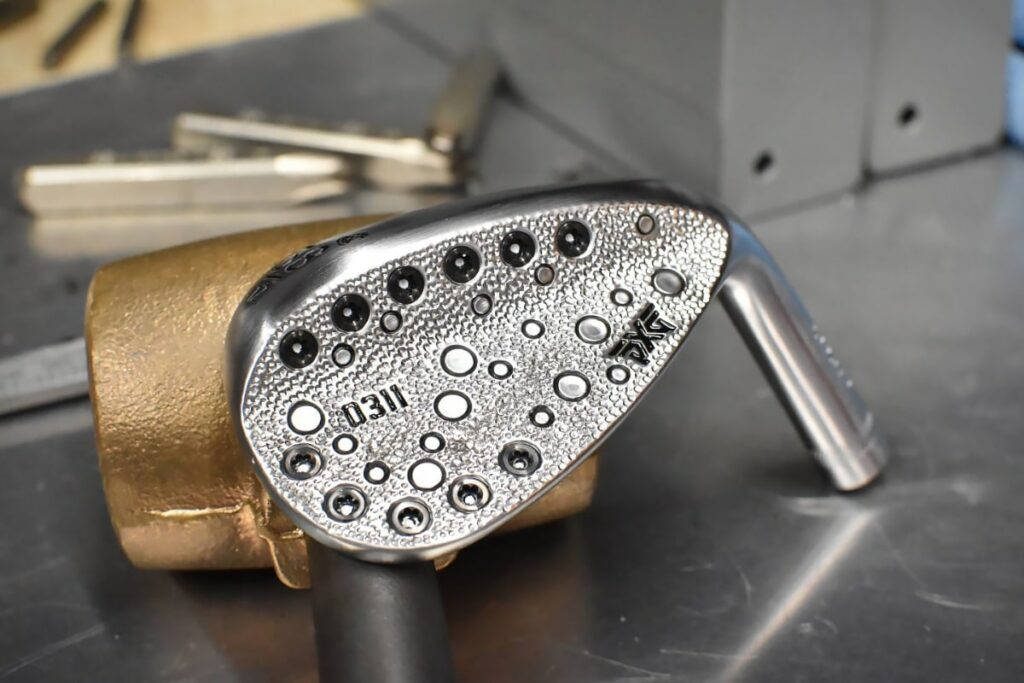
For a unique patterned wedge design, you can use a combination of stamping, hammering, and stippling. Each of these methods will provide their own texture, giving you the freedom to design your wedge however you wish.
In addition, apply paint to some of the stamped areas to highlight key areas of the pattern, such as a meaningful number or icon.
The PXG wedge above was stamped by Wedge Wizard, who takes this to another level by utilizing polished round metal inserts on a contrasting stippled background.
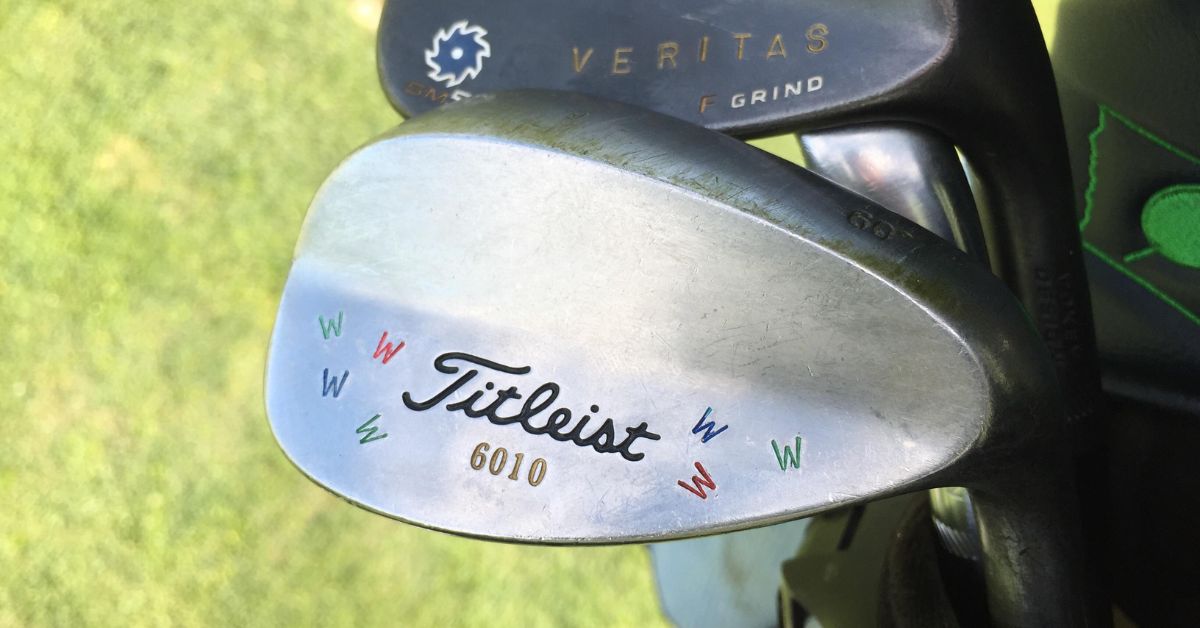
2. Stamp Your Name or Initials
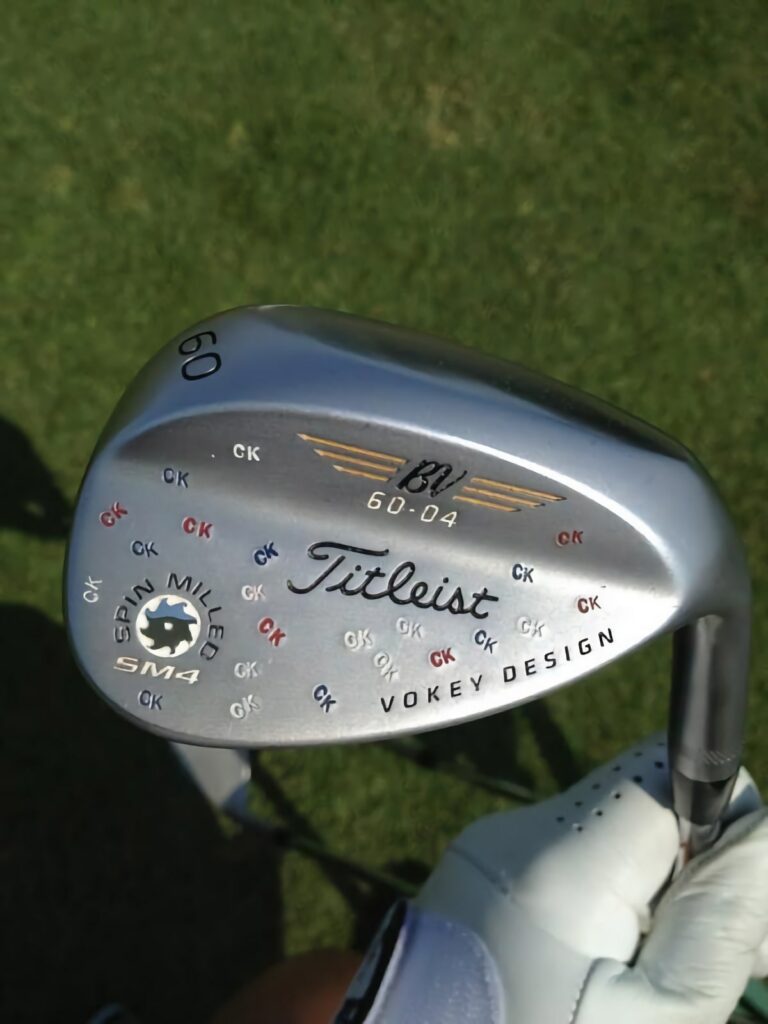
Another wedge stamping idea—and one that’s perhaps more personal—is to create a design around your name or initials.
The 60-degree Vokey wedge pictured above belongs to LPGA tour player Christina Kim, customized with her initials in a “snowflake” style of stamping.
3. Stamp Your Favorite Quotes

Big fan of film, television, or books? If that’s your thing, the perfect wedge stamping idea is to emboss your clubs with your all-time favorite quotes.
Pro golfer Morgan Hoffman made headlines in 2014 for his set of Anchorman-themed wedges, featuring quotes from the comedy classic. Each wedge is stamped with a saying from the film, from Ron Burgundy’s “That escalated quickly” and “You stay classy, San Diego” to Brick Tamland’s classic phrase: “I love lamp.”
4. Stamp the Names of Your Clubs
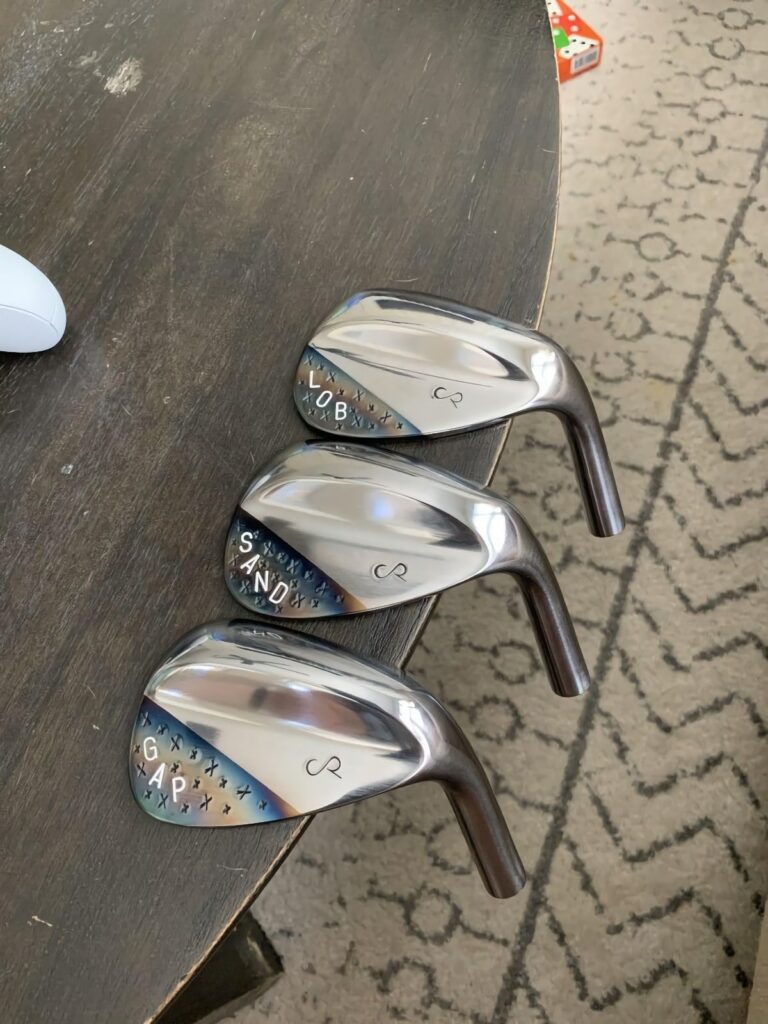
Often, wedges are marked with the degree of loft but without the name of the club itself.
Add some flair to your wedges by stamping them with the words gap, sand, and lob. Not only will this make your wedges distinctly unique, but it will also make it easier to grab the right club at a quick glance.
It’s also useful to stamp the degree of loft if you have your wedges bent to new lofts.
5. Stamp Your Favorite Sports Team
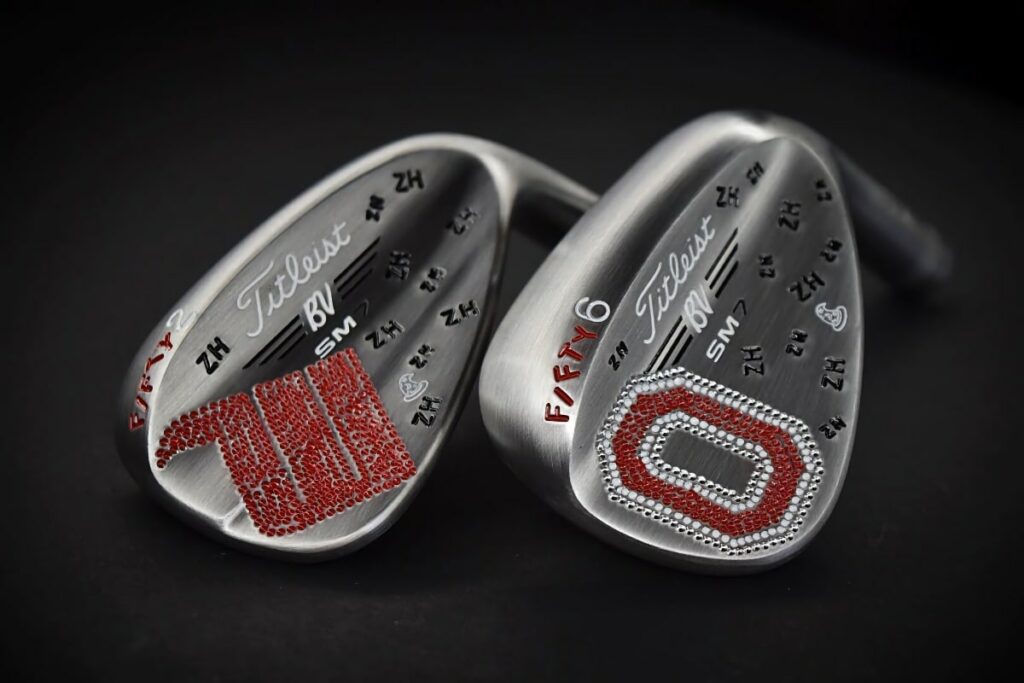
Last but not least in our list of wedge stamping ideas, give your favorite sports team a special place in your golf bag by adding their badge to your clubs.
Wedge Wizard produced a unique design for an Ohio fan, applying paint to represent the team’s colors in addition to stamped initial details.
How to Stamp a Wedge
You don’t need to be a tour pro to personalize your wedges. In fact, you can stamp your wedges in the comfort of your home – with the help of a few tools.
Read on to learn how to stamp a wedge!
Before You Start
You will need a few tools and items to stamp a wedge:
- Sturdy workbench – capable of withstanding hammer blows
- Anvil – or equivalent sturdy hard surface to set the wedge on
- Double-sided tape – to secure the wedge to the hard surface
- Metal stamps – these can be found here for a solid price
- Hammer – with a metal head to use on the metal stamps
- Nail polish – if you wish to paint the stamped areas
- Acetone – to remove any excess paint
- Golf wedge – of course!
Now, let’s get into the step-by-step guide in how to stamp a wedge!
Step 1: Preparation
Firstly, apply two layers of double-sided tape to the anvil.
Then, set the wedge on the tape, so that the rear side is facing upwards.
Step 2: Stamping
Next, it’s time to get your metal stamps ready. The stamps you use should be designed for use with metal, with a sharp edge.
>> You can order your Wedge Stamping Kit here
Once your stamps are ready, hold your chosen stamp vertically in position and strike the top with the hammer. After a few hits, check the results for any shallow spots.
PRO TIP: Slightly rotate the stamp, then strike with the mallet again to focus on shallow areas and ensure an even finish.
Repeat this process using your chosen stamps to achieve your desired design.
Step 3: Painting
If you’re looking for a painted finish, it’s time to apply nail polish to the stamped areas.
Nail polish is quick-drying and hard-wearing, which makes it an ideal solution for golf clubs where durability is necessary.
Next, apply an even coverage of paint to the stamped areas and wipe away any excess paint with a cloth.
PRO TIP: A heat gun or blowtorch will speed up the drying process.
Finally, use acetone to remove any unwanted paint.
The video below by GolfWRX provides an excellent demonstration of the wedge stamping process, helping you to customize your wedges at home:
