
Wedge stamping is a great way to add a personalized touch to your clubs.
You can turn your run-of-the-mill wedge into a unique one-of-one with some metal stamps, an anvil, a hammer, some paint, and a dash of originality.
In this article, you’ll learn everything you need to know about wedge stamping — from unique ideas and the tools required, to the step-by-step process.
Time to unleash your creativity!
Wedge Stamping
Wedge stamping is a fun way to customize your golf wedges. Essentially, it involves stamping letters, shapes, or patterns into the rear of the club using an anvil, metal stamps, and a hammer. Usually, the embossed areas are filled with colored paint.

What is Wedge Stamping?
Wedge stamping is simply a means of permanently adding custom text, numbers, symbols, or patterns to the back of a wedge using stamps and a hammer.
It’s a creative and fun way to add a sense of personality to your golf clubs.
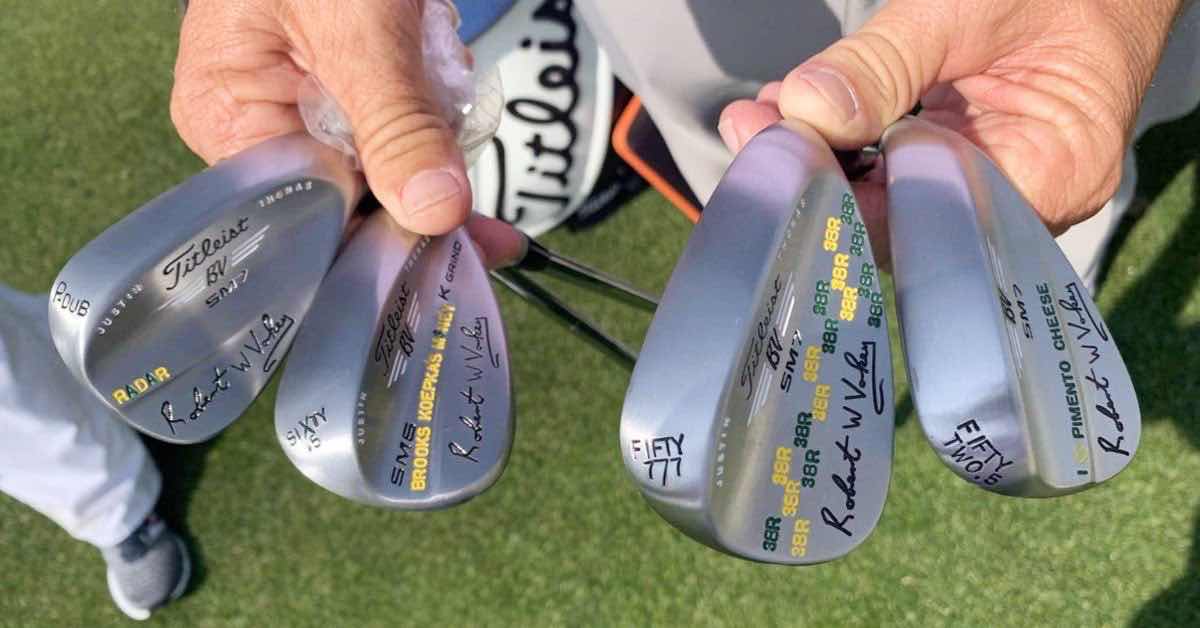
In fact, many pros stamp their wedges. This includes Justin Thomas, who has famously personalized his wedges for several high-profile tournaments over the years:
Club stamping isn’t just restricted to wedges. Some choose to add customizations to their irons or putters — wedges simply offer the most space to get creative.
Wedge Stamping Ideas
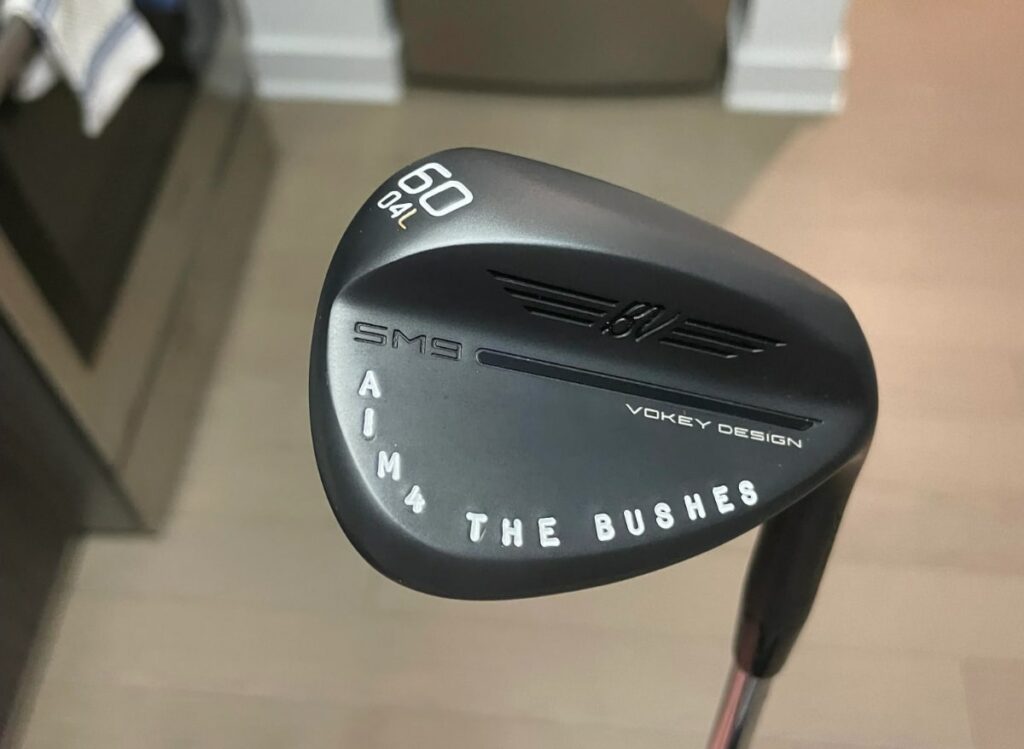
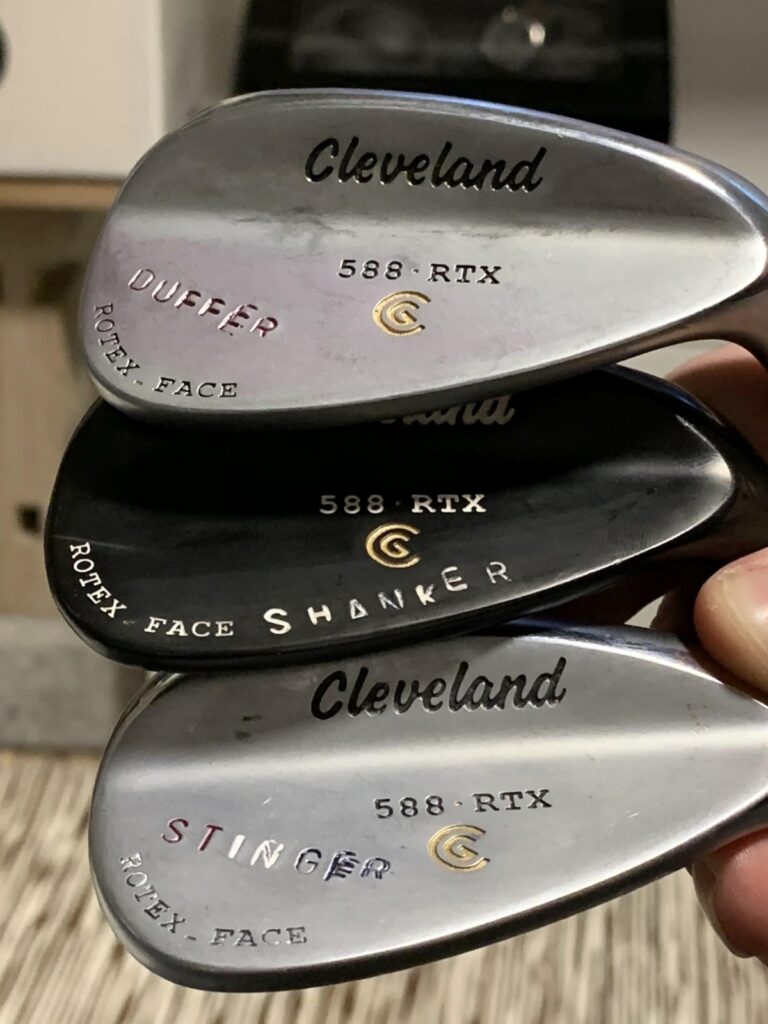
There are several unique wedge stamping ideas to choose from. Most commonly, golfers choose to stamp their initials or an inspirational and meaningful quote.
Here are some creative wedge stamping ideas for inspiration:
- Stamp a unique pattern
- Stamp your name or initials
- Stamp your favorite quotes
- Stamp the names of your clubs
- Stamp your favorite sports team
Ultimately, there are endless options. The best ideas are those that are meaningful to yourself, your family, or your golf game — whatever condition it might be in!
Get creative, and enjoy the process.
How Much Does Wedge Stamping Cost?
Mobile wedges stamping services will typically charge between $25 and $50 per club depending on the scale and complexity of the design.
For instance, Customize My Clubs offer several packages at this price level.
However, you can choose to stamp your wedges at home to save the cost. In this case, the cost is under $50 for a wedge stamping kit — which can be used multiple times.
>> You can order your Wedge Stamping Kit here
How to Stamp Wedges at Home
Stamping your wedges at home is surprisingly easy, provided that you have the correct tools, materials, and space to complete the task. Here’s what you’ll need:
- Sturdy workbench – capable of withstanding hammer blows
- Anvil – or equivalent sturdy hard surface to set the wedge on
- Double-sided tape – to secure the wedge to the hard surface
- Metal stamps – these can be found here for a solid price
- Hammer – with a metal head to use on the metal stamps
- Nail polish – if you wish to paint the stamped areas
- Acetone – to remove any excess paint
- Golf wedge – of course!
Let’s dive into the details of the process.
Step 1: Preparation
Firstly, stick a couple of layers of double-sided tape on the upper side of the anvil. This provides some protection to the clubface during the stamping process.
Then, place the wedge on the tape, so that the rear side is facing upwards. Make sure the face of the wedge is bonded securely to the double-sided tape to prevent slips.
Step 2: Stamping
Next, it’s time to prepare your metal stamps. The stamps you choose should be made for use with metal, so should be equipped with a sharp edge.
>> You can order your Wedge Stamping Kit here
Set out a plan for your design. This can be as simple as a couple of stamped initials, or as complex as a full patterned design. It’s useful to sketch out your idea beforehand.
Then, hold the first stamp in position and strike the top with the hammer. After a few hits, check the results to identify any shallow spots.
PRO TIP: Rotate the stamp slightly each time, then strike with the hammer again to eliminate any shallow areas for an even finish.
Repeat this process as needed until your design is complete.
Step 3: Painting
If you intend to have a painted finish, it’s time to apply paint to the stamped areas.
For this step, we’ll be using nail polish. It’s quick-drying and hard-wearing, making it the perfect solution for golf clubs where long-term durability is needed.
Apply an even coating of paint across the stamped areas, and wipe away any excess paint with a cloth. Make sure that all the gaps are filled at this stage.
PRO TIP: A heat gun or blowtorch will speed up the drying process.
Finally, wipe some acetone over the surface to remove any unwanted paint.
Check out the tutorial below by GolfWRX, which offers a great demonstration of the wedge stamping process so you can stamp your wedges at home:
FAQs
Here are some common questions in regard to the wedge stamping process:
What Size Stamps For Golf Clubs?
Usually, you’ll want to use stamps that are less than half an inch tall. This will give you plenty of flexibility to produce your desired design on the back of a wedge.
For example, this wedge stamping kit contains metal stamps with a 5/16″ letter height.
However, it entirely depends on your vision. While these stamps are ideal for text-based designs, other stamps can vary in size provided that you have enough space.
Where to Get Wedges Stamped?
You can stamp your wedges at home. Alternatively, you can use a professional service like Customize My Clubs, which offers several club stamping design options.
Ultimately, it depends on whether you have the tools at home — or if you’re more comfortable handing over responsibility to a professional!
Conclusion
In summary, wedge stamping is an excellent way to add a personal touch to your wedges to help set them apart from a standard off-the-shelf model.
To stamp your wedges at home, follow these 3 steps:
- Prep — apply double-sided tape to an anvil and set the wedge face-down
- Stamp — position the metal stamps, and repeatedly strike them with a hammer
- Paint — fill the embossed areas with nail polish, wiping the excess with acetone
Provided that you have the tools, space, and some creativity — you can stamp your own wedges at home in a matter of minutes (depending on the complexity!)
